Backups
NotallyX provides features to securely back up and restore your notes, labels, and attachments.
Auto-Backup
NotallyX can automatically back up your notes to prevent data loss:
- Open Settings in NotallyX.
- Navigate to Auto Backups.
- Tap Backups Folder and select Choose folder to specify where backups will be stored.
- Once your backup folder is set, you can configure:
- Backup on exit Note automatically: Triggers an automatic backup whenever a note is modified and closed.
- Periodic Backups: Automatically creates backups at regular day intervals.
- Maximum Backups to Keep: Automatically cleans up older backups beyond your specified limit.
Manual Backup
You can also create backups manually at any time:
- Open Settings in NotallyX.
- Navigate to Backup.
- Tap Export backup.
- Choose a file name and location to save the backup file.
- Tap Save.
Backup Password Encryption
For added security, you can password-encrypt your backup files:
- Go to Settings > Security.
- Tap Backup password and set an encryption password.
- Future exported backups will be encrypted with AES using your password.
- When restoring from an encrypted backup file, you will be prompted to enter this password.
Restoring from Backup
To restore your notes and attachments from a backup file:
- Open Settings in NotallyX.
- Navigate to Backup.
- Tap Import backup.
- Select the backup file from your storage.
- If the backup is password-protected, enter the correct password when prompted.
- Tap Import Backup.
Note: Importing a backup merges restored notes and labels with your existing data without deleting current notes.
Using Cloud Storage / WebDAV
SAF WebDAV Mounts
If you want to store your backups on a cloud storage or WebDAV server, you can use a third-party app to mount your WebDAV server into Android's Storage Access Framework (SAF).
Popular tools for mounting WebDAV include DAVx⁵ or RS File Explorer.
For example, using DAVx⁵:
- Open DAVx⁵ -> Menu -> WebDAV mounts -> +.
- Enter the URL, Display Name, Username, and Password of your WebDAV server -> tap Add mount.
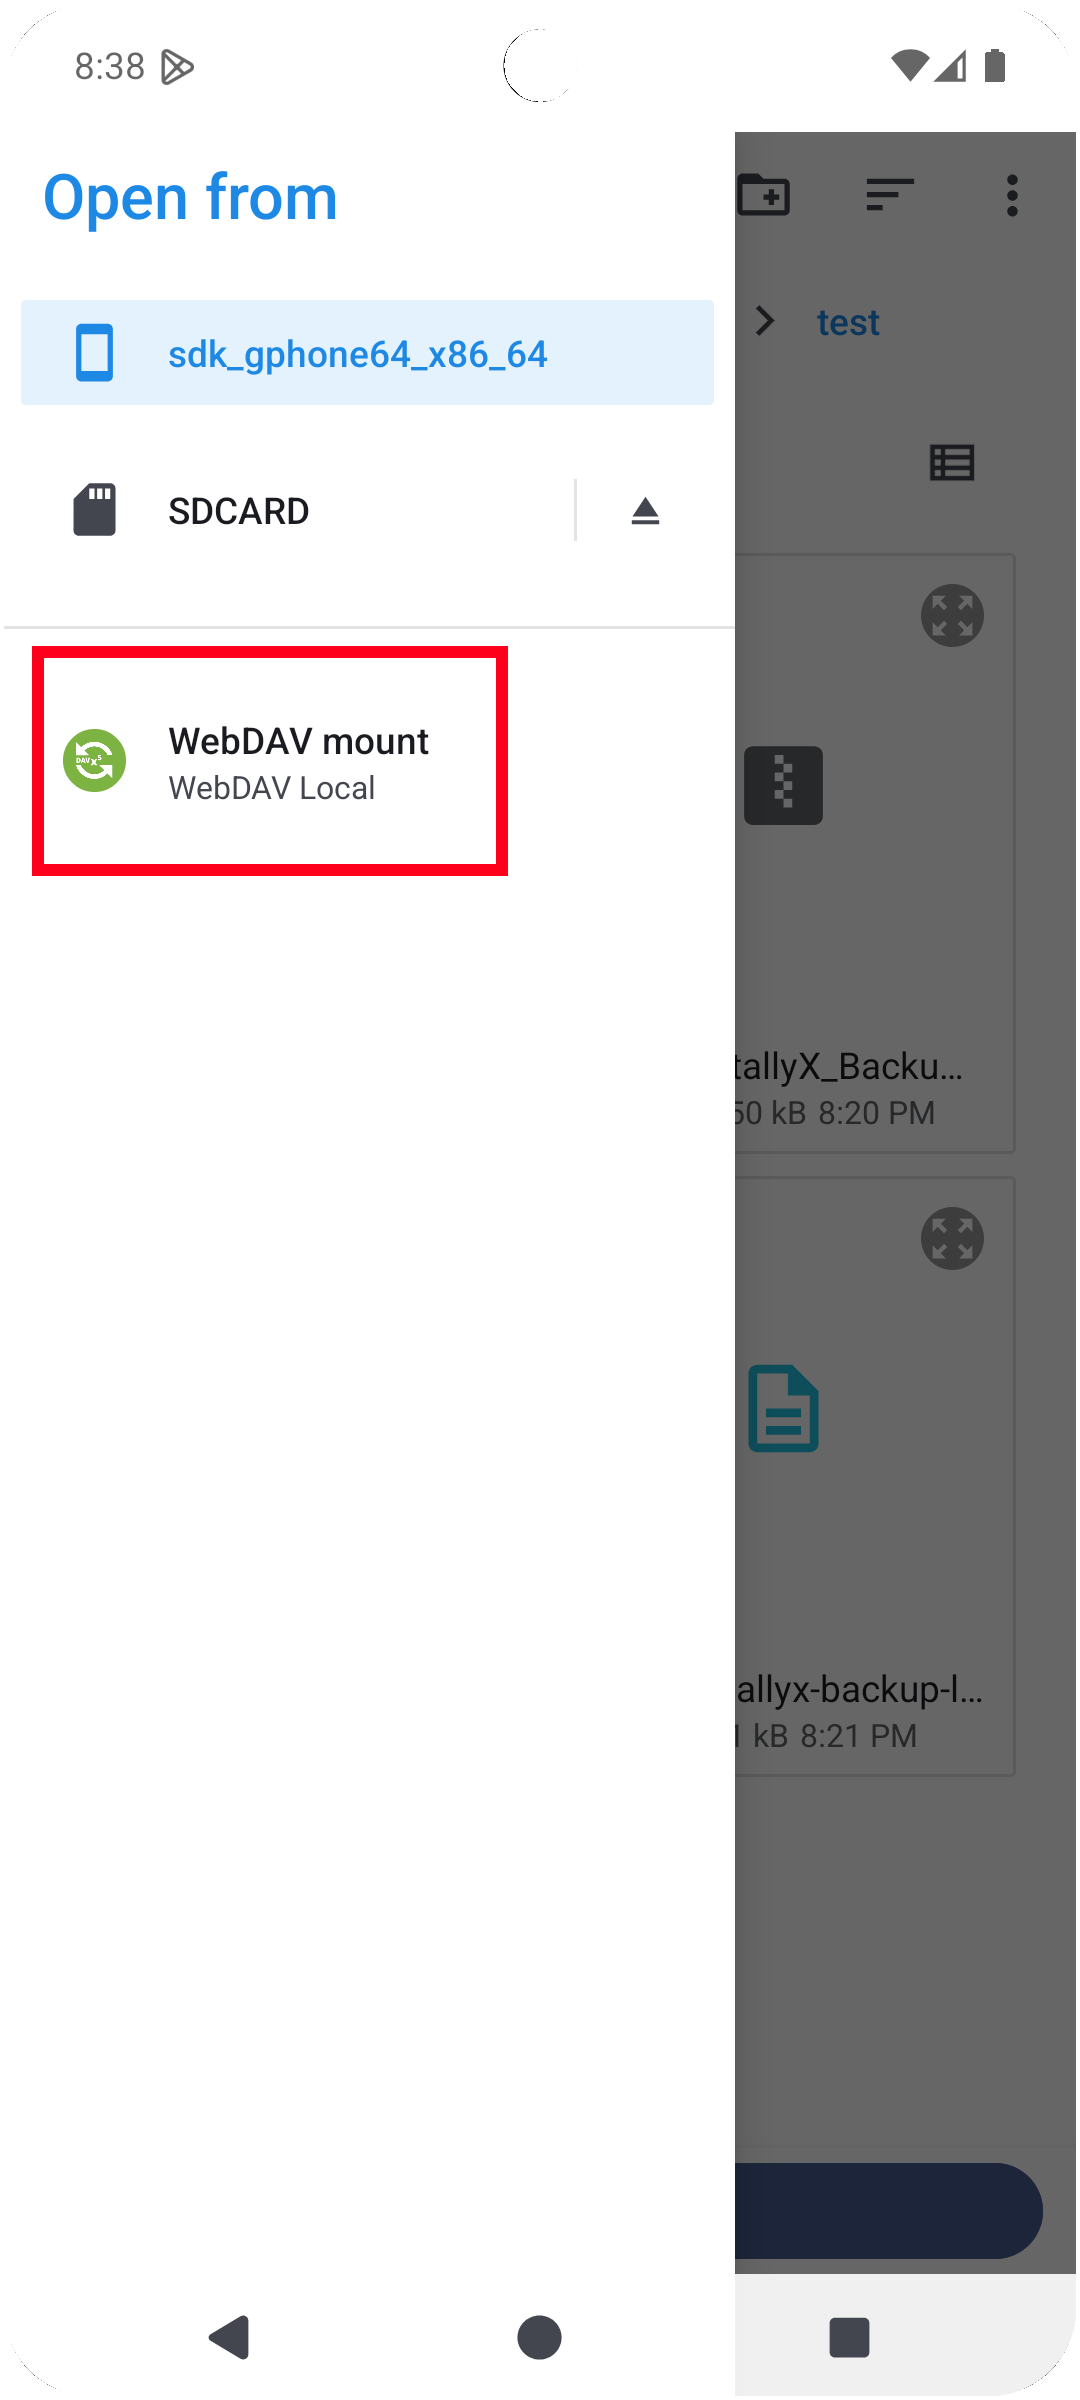
- In NotallyX Settings > Auto Backups > Backups Folder, select your WebDAV mount in the Android file picker:
Folder Synchronization
Alternatively, you can use synchronization apps like FolderSync or Syncthing to sync a local folder on your device with your cloud storage or other devices, and set NotallyX's backup folder to that synced location.
Related Features
- Settings: Explore all app settings
- Security and Privacy: Learn about biometric lock and privacy features